Training A Self-Driving Car to Learn from Human Driving Behavior
09 August 2018
I was enrolled in the Udacity Self-Driving Nanodegree starting from this summer, and this is my solution to the behavior cloning project in my Nanodegree courses. Comparing to other solution that could be found on the web, this solution is clean and simple, and the resulting model can drive the car perfectly on both tracks. The code and trained model of this project are available on [Github].
The goals/steps of this project are the following:
- Use the simulator to collect data of good driving behavior
- Build, a convolution neural network in Keras that predicts steering angles from images
- Train and validate the model with a training and validation set
- Test that the model successfully drives around track one without leaving the road
Data Collection
In this project, I use the Udacity self-driving simulator to record driving data including both track with both forward and reverse direction. In total, there are 4 laps driving and around 10K frames in my final dataset. I also record some data where I drive the car from off-track to the center.
Even though some posts in the discussion forum suggest to collect no less than 40K of data, I found that my dataset is enough to train a good model, since it includes enough varieties (especially the data from the second track).
I also use the images captured by the left camera and right camera during training. Instead of using a fixed correction value, I tried to reduce the correction when the ground truth angle from the center camera is 0. In my final version, the correction is set to 0.25 but will be reduced to 0.05 if the current steering angle is 0. I use this design because if the current track is straight, the vehicle does not have to turn that much even it is not in the center. I found this design will produce a more smooth driving result.
Model Architecture
My final model is modified from the Nvidia pipeline. Comparing to the original structure, I made the following changes:
-
Instead of using YUV color space for the input image, I found that RGB is good enough to produce a smooth driving result. So I decided to keep the original RGB frame for simplicity.
-
A cropping layer is added before the normalization layer to cut off 75 pixels from the top and 25 pixels from bottom. The output shape after cropping is 60x320.
-
The original Nvidia model takes 66x200 as input size. I didn’t add any resizing as many other students in the discussion forum do, so the input shape of the normalization layer is just 60x320.
-
Adapting to this change, I remove the last convolution layer to make the shape compatible.
-
The normalization layer uses (x = x / 127.5 -1) to normalize the input frames.
-
Several dropout layers were added to the model (see the visualization of the model structure below)

Training Strategy
1. Attempts to reduce overfitting in the model
The model contains dropout layers in order to reduce overfitting. I also found that collecting data from the second track helps the model to generalize much better. A data augmentation technique is also used to randomly flip the input frames to produce more data.
During training, the dataset is split into a training set with 95% of data and a validation set with 5% of the data to ensure the model is not overfitting. The model was finally tested by running it through the simulator and ensuring that the vehicle could stay on the track.
2. Model parameter tuning
The model used an Adam optimizer, so the learning rate was not tuned manually. The model was trained for 30 epoch and the one with the lowest validation_loss is saved and used as my final model.
3. Appropriate cropping
Among all the thing I’ve tried, I found that using an appropriate cropping is the most helpful part. Below are the visualization of several cropping sizes.
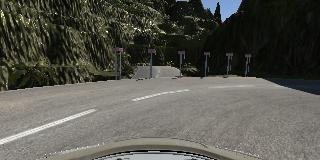


I finally chose to use a more aggressive cropping (75 pixels from top and 25 from bottom) to let my model concentrating on the road right in front of the vehicle. This is especially helpful for driving on the second track.
Final Results
Below are the result of our final mode, and it drives perfectly on both tracks.